
I made my first loaf of sourdough in Fall 2025, using starter shared from my friend Anna Wimmer of Sweet and Sourdough, who sells her sourdough here on Cape Cod. I made my first loaf following the Farmhouse on Boone Recipe. Then I switched to the Clever Carrot recipe, and then I read Flour Water Salt Yeast by renowned artisan baker Ken Forkish. That is when my sourdough baking really took off, and I started developing my own recipe and experimenting with whole wheat. When experimenting, I have found it is imperative to write down your ingredient weights, temperatures, techniques, and results so I can remember later what the heck I did!
Ingredients:
250 grams of King Arthur bread flour or AP flour
250 grams of King Arthur Golden whole wheat flour. Other whole wheat flours may perform very differently, as golden whole wheat flour has similar taste and texture to white flour.
325-340g of water, around 95 degrees
100-130 grams starter. 100 grams is enough for active starter, but I will use extra if my kitchen is really cold or if my starter is past peak.
10 g of salt
25-40 g of olive oil (lately I have wondered if maybe I shouldn’t use the olive oil at sourdough baking temps? It adds some extra flavor and workability though!)
TL/DR version of my method:
Proof until doubled with 3-4 stretch and folds throughout the day. Shape and chill overnight. Preheat Dutch oven to 500F, lower oven to 450 (or 475) and bake covered for 30 minutes. Bake an additional 10-15 minutes uncovered. Temp it when it starts to look golden brown. Keep checking internal temperature every 3-5 minutes until you get to 205-208 degrees…but don’t you dare think of sticking your thermometer into you bread, inside of the oven, without donning your beefiest oven mitt. Don’t do it! Don’t!
My full mixing, proofing, baking, and slicing method:
Combine all ingredients together using a squeezing motion so that the ingredients squeeze through your hand like toothpaste coming out of a tube. Mix until the dough looks shaggy and there are not big clumps of dry flour.
Autolyse for 30 minutes to an hour, then begin stretch and folds:
Do 3 or 4 rounds of stretch-and-folds throughout the day, with the last one at least one hour before the final rise. To do a single stretch and fold, wet your hand and scoop up and grab one corner of the dough from the bowl and stretch until you have maximum tension, but don’t let it break. Then gently fold that stretched dough into the center. Turn the bowl a quarter turn, and repeat until you have gone around and done four stretch and folds on all four sides. Throughout the day, you should do a total of 3-4 stretch and folds, with at least 30 to 60 minutes between each stretch and fold. Do not do a stretch and fold within the last hour of rising.
Let the dough rise until doubled or as long as you can. In his book, Ken Forkish advises that at some point it’s almost helpful to overproof your dough at least once so that you learn by experience how long your dough can go. Over the winter, I mix my dough sometime between 9 and 11am and do the final shaping between 9-11pm. As my kitchen temps rise I am sure it will proof more quickly. To see if it is fully risen, press a floured finger in the dough. If the dough springs back quickly and fully, it is under risen. If it springs slowly and leaves a small indent, it is risen. If it does not spring back and stays full indented, you have over proofed… or made pizza dough, depending on how you think of it!
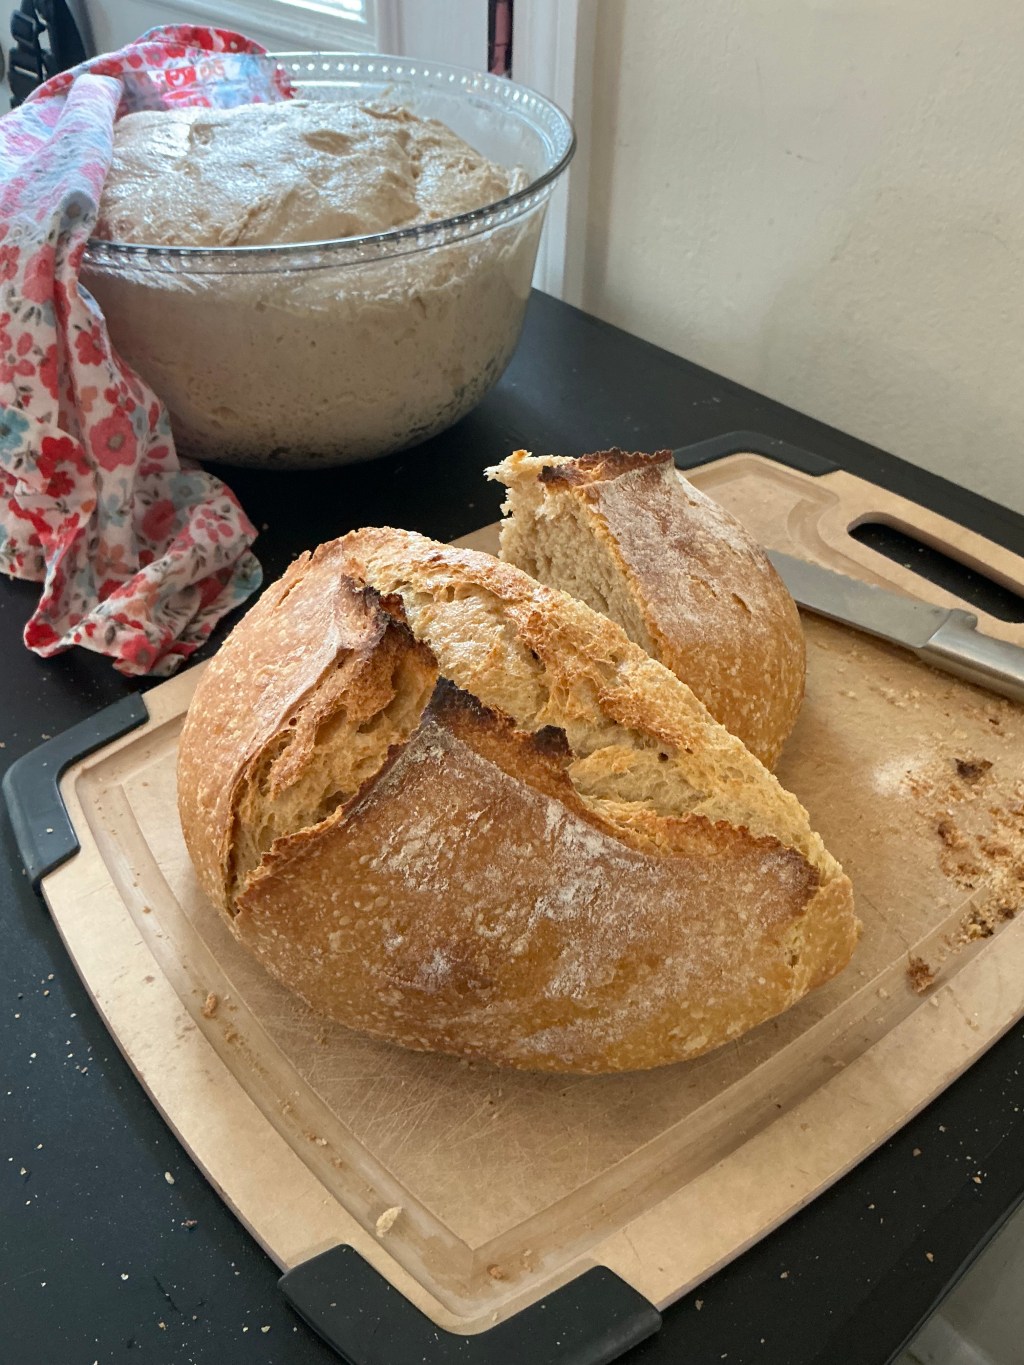
To do the final shaping once proofed, add lots of flour to your hands and then gently release the dough from the bowl onto a floured surface. I basically stretch and fold it one last time into a ball, and then flip it over so the folds are down on the floured surface. Tuck and spin and pull the ball towards yourself until you have some nice tension. Place in a floured banneton or a bowl with a floured tea towel with the folds on the bottom. Cover and cold proof in the fridge over night.
The next morning, place a Dutch oven with lid in the center rack of the oven and preheat for 30 minutes to an hour. Once the Dutch oven is preheated to your desired degree of patience, carefully place the loaf in. You can put the loaf in with the folds down in the Dutch oven and score the top, OR for a more rustic look, you can put the folds facing UP in the Dutch oven and let it naturally split open! I think this makes a beautifully rustic, artisan look to the bread. I like going back and forth between methods depending on my mood. I don’t use parchment paper anymore, and my dough has never stuck in my well seasoned cast iron Dutch oven. Put the (still very hot!) lid back on the Dutch oven and place the dutch oven in the oven. Lower the temperature to 450F (or 475) and bake covered for 30 minutes. Bake 10-15 minutes uncovered. After eight to ten minutes uncovered, start to look through the window to see if it looks well browned. If it looks well browned or has burned edges, check the temperature. If it is between 205-208F, take it out. If it is not to 205F, put it back in and keep checking internal temperature every 3-5 minutes until you get to 205-208 degrees—it can get up to temp surprisingly quickly. If it is only to 180 or 190F but already looks golden brown, put the lid back on and keep checking every 2–5 minutes until you get to 205F
Put on a cooling rack and let it cool at least 30 minutes. To slice, I cut straight down the middle and then set a half loaf with the flat side down so that I can easily cut straight half slices. I find slicing the bread as full slices from one side of the bread to the other can result in uneven slicing. Enjoy and share with a friend!


Leave a comment